


In the past, an author’s personal website was the holy grail of finding information on our most beloved writers and storytellers. From book tours to correct reading order, to a mailing address where you could send fanatical letters and wail about the death of your favorite characters. Like a brick house we built with our bare hands, they were our personal spaces, our platforms through which we reached our readers. But, with the rise of blogging and social media, the authors website is slowly fading into antiquity. Or is it? Times are constantly changing and with it comes a flux of new technology and social platforms that overwrite the old. If you’re a millennial like me you no doubt witnessed the death of MySpace and the rise of Facebook and Twitter. But, who’s to say that in ten years these popular sites will still be around? Having a Facebook “like” page and a booming twitter account are fine, but in the case that Facebook nosedives at any time in the future, having your own platform that’s controlled solely by you may be your only saving grace. I can already hear you screaming at me, “But websites are expensive! I can’t afford that!” and “I don’t know how to code a website! I can’t be in control of something I know nothing about!” Relax friends and colleagues, I’m here to provide a comprehensive guide on building a simple website that you can operate without entirely on your own. Follow along and in three simple steps, you will have your own FREE platform that no one can take from you, not even the Facebook banning police. I know we’ve all had our run in with those jerks. Here we go!
STEP ONE: Choosing a host website
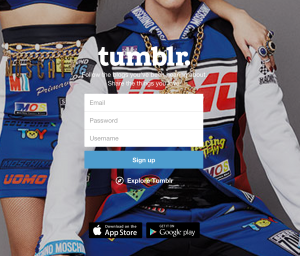 There are many platforms that allow you to host your website with a custom domain name, which is what we’ll be using here so that you completely “own” your website. The host I think is the best and personally use is Tumblr.com. Tumblr is a blogging website that allows users to create their own blogs and seamlessly share content from millions of users all around the world. This both allows authors to find and interact with new and prospective fans while simultaneously keeping their blog or website fresh with new content. I’m going to go out on a limb here and assume you already have an email address. If not, I highly recommend Gmail for all your emailing needs. Grab your email and navigate to http://www.tumblr.com and create an account. Account creation is extremely simple. Simply enter your email address, password and select a username. I suggest creating a username that in some way correlates to what you’re trying to accomplish. AuthorJenineHadwick is perfectly fine as apposed to PrincessPonyGlitterBootyShorts. I’m serious, tumblr usernames get pretty rediculous. Now, open up a new tab and get ready for step two.
STEP TWO: Acquiring a domain name
Head over to http://www.dot.tk/. This is your domain provider.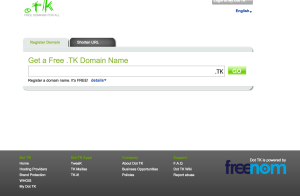 A domain provider, in a nutshell, is a computer network server where your website will be hosted 24 hours a day, seven days a week without disruption. Essentially, your personal computer, the one you’re using right now could act as a host for your website. With a few apps and minor HTML and coding knowledge, you really wouldn’t need a domain provider at all. Except for the fact that your computer isn’t turned on and connected to t
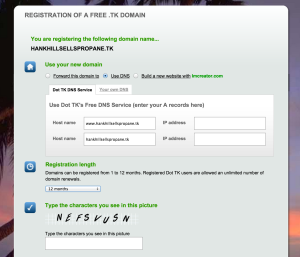 he internet all day every day and your internet connection probably wouldn’t have the strength to support all the people flocking to your website. Domain names usually range in price from $10 a month to over $100 a year for a .com domain. But, with the dot.tk website, you will be
provided with a .tk domain name completely free of charge. Yes, COMPLETELY free. The only catch is that you have to renew your domain name every year. But, for a free website, that doesn’t seem too daunting now does it? Head over to http://www.dot.tk and pick your domain name. Now, this will be the NAME of your website, the name through which users will find you. For example, my website is http://www.acgreenlee.com. I opted to pay for a .com domain name for personal reasons but, notice how simple the web address is. Your domain name could be anything from FamousAuthorHeather.tk to HankHillSellsPropane.tk. Just make sure it’s exactly what you want and something you won’t regret choosing later. After checking that your domain is available, proceed to the signup process.
Configuration:
- Select Use DNS.
- For the IP address slots, enter the IP from Tumblr (66.6.44.4) in both slots.
- Select 12 Months from the drop down menu.
- Enter the CAPTCHA.
- Complete registration.
Head back over to tumblr:
- Click Settings (the gear icon) at the top of your Dashboard.
- Click the blog you’d like to update on the right side of the page.
- Click the pencil to the right of the username section and enable “Use a custom domain.”
- Enter your domain (e.g. mywebsite.tk).
- Click “Test your domain.”
- Correct problems if the test finds any, and click “Test your domain” until the test is successful.
- Hit “Save.”
If you navigate to your username.tumblr.com blog and it tells you that theres a problem, don’t panic, this is a good thing! It means tumblr is pointing correctly to your domain name and all there’s left to do is wait until all the mechanical stuff updates iteslf. Now lets move onto step three, the fun part!
STEP THREE: Customization
The thing I love most about tumblr is how easily customized it is, even if you have no knowledge of coding. After you’ve beaten your website into shape and you have your AuthorsWebsite.tk website set up and tested, head back to tumblr and go Blog Settings and Edit Theme. You can choose from a million free (and paid if you’re about that life) themes to make your website look however you want. By uploading a header image and profile picture, most themes will give you an entirely personalized website at the push of a button. For even more personalization, hit Edit HTML in your blog editor and get ready for your first, simple HTML coding lesson. Head over to any free tumblr theme code site (we’re going with http://kawaiilayouts.com just because I love them) and copy one of their free theme codes. Head back over to the Edit HTML section of your tumblr editor, select the HTML that’s already there, hit paste, update preview and TADA. Completely new website with the click of a button.
With your new website you’ll be able to truly build an authors platform independent of any social media sites personal fate. And, in the case that something happens to tumblr, there are quite literally a million different alternatives to hosting, and your domain provider dot.tk even has its own page builder if you ever want to cut your ties to a host all together. You can have your cake and eat it to by using social media in conjuncture with your personal website, extending your reach and your influence exponentially. Make them work with each other and for each other! Now that you have the foundation laid out for you, what are you still doing here? Go! Go build a website!
If you enjoyed this post or found it useful consider following the author on Facebook. Happy creating!
